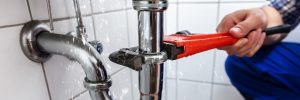
Water leaks can be a homeowner’s worst nightmare, leading to costly repairs and potential damage to your home. It’s obvious when you need to call a Chatham plumber, but navigating beyond that can be difficult.
Swift action and knowing what to do can save you both time and money. In this comprehensive guide, we’ll walk you through five crucial steps to effectively navigate leaks, locate their source, and handle the cleanup process.
Step 1: Identify the Signs of a Leak
The first step in managing a leak is recognizing the signs. Common indicators include:
- Water Stains: Brownish stains on ceilings or walls.
- Dripping Sounds: Constant or intermittent dripping noises.
- Musty Odors: Persistent damp smells in certain areas.
- Increased Water Bills: Unexplained spikes in your water bill.
- Visible Water: Puddles or drips where there shouldn’t be any.
By keeping an eye out for these signs, you can catch a leak early and minimize potential damage.
Step 2: Locate the Source
Once you suspect a leak, the next step is to pinpoint its source. Here’s how you can do it:
- Check Appliances: Inspect dishwashers, washing machines, and water heaters for any leaks.
- Inspect Plumbing Fixtures: Look at sinks, toilets, and bathtubs for any signs of water around the base or on the floor.
- Examine the Roof and Attic: Water stains or damp insulation can indicate a roof leak.
- Review Exterior Walls and Foundation: Look for cracks or pooling water around your home’s foundation.
If the source is not obvious, it may be behind walls or under floors, necessitating professional help.
Step 3: Call a Professional Plumber
Once you’ve located the source or if you’re unable to do so, it’s crucial to call a professional plumber. A licensed plumber can:
- Accurately Diagnose the Problem: Using specialized tools, they can find leaks that aren’t visible to the naked eye.
- Perform Necessary Repairs: They can fix the leak promptly to prevent further damage.
- Provide Expert Advice: They can suggest ways to prevent future leaks, such as maintenance tips or necessary upgrades.
Step 4: Mitigate Water Damage
While waiting for the plumber, take steps to mitigate water damage:
- Turn Off the Water Supply: If the leak is significant, turn off the main water supply to prevent further flooding.
- Remove Excess Water: Use buckets, mops, and towels to soak up standing water.
- Protect Belongings: Move furniture and personal items away from the affected area to prevent further damage.
- Ventilate the Area: Open windows and use fans to help dry out the area and reduce moisture.
Step 5: Clean Up the Mess
After the leak is repaired, it’s time to clean up:
- Dry the Area Thoroughly: Use dehumidifiers and fans to ensure the area is completely dry.
- Sanitize: Clean surfaces with disinfectant to prevent mold and mildew growth.
- Inspect for Damage: Look for any water damage to floors, walls, or ceilings that may need repair.
- Consider Professional Restoration: If the leak was extensive, professional water damage restoration services might be necessary to ensure your home is safe and fully restored.
Prevent Future Leaks
Prevention is always better than cure. Regularly inspect your home for signs of wear and tear, and schedule routine maintenance for your plumbing and appliances. Installing water leak detectors can also provide an early warning system to catch leaks before they cause significant damage.
Established in 1912, Max Sr & Paul Schoenwalder Plumbing, Heating and Air Conditioning, A Corp. is your trusted resource for reliable plumbing. Reach out to us today.

